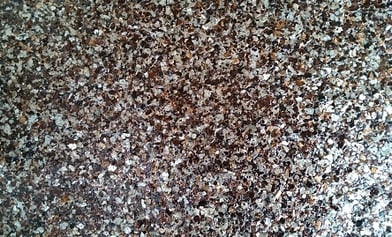
Looking for a unique way to impress customers and make your business’s physical space stand out? A metallic epoxy floor coating will transform a boring concrete slab into an attention-grabbing work of art.
Offering all the practical features of regular epoxy flooring (such as high durability and longevity), these specialty coatings use pigments and other additives to create a number of visual effects, including:
- A satiny, metallic shimmer
- Glitter or reflective quartz-like flakes
- Two-toned swirls or ripples for a 3D water effect
- Subtle, multi-color tones that look like polished marble
- Bold patterns that look like galaxies or moon craters
Colorful, high-contrast designs can dress up a science center or art gallery, while a subtle shimmer can add elegance to a high-end car dealerships, salon, or premium retail center. No matter what pattern is created, the floor still maintains a smooth, high-gloss surface.
Metallic epoxy coating installation process
All epoxy floor coatings depend on a chemical reaction between a resin and a hardener that creates an extra-hard, durable surface. To create specialized design effects, pigments or metal powder are added during critical times. Here’s a broad overview of what goes into the installation process of a metallic epoxy coating:
1. Surface preparation
As with any floor coating, proper surface preparation is vital to make sure the epoxy binds properly to the floor. The concrete must be cleared of debris, oils, and old coatings, and cracks should be filled to provide a smooth surface. (Learn more about why surface preparation matters.)

2. Combine elements carefully
Because epoxy’s strength comes from a chemical reaction, it’s important that the coating installer combines the resin and hardener at precise ratios and mixes them thoroughly. Depending on the type of metallic effect desired, the mixing stage may also be when the technician adds mica flakes, pigments, glitter, or powdered metals such as copper, bronze, aluminum or pewter.
3. Apply the epoxy to the floor
Once the epoxy and resin have been mixed, there’s a limited time frame for applying the epoxy coat to the floor. Professional installers will have specialized tools for spreading the liquid coating evenly, including shoes that allow them to walk over the wet coating without marring it.
4. Create patterns if desired
For some designs, the textures depend entirely on the physical skill of the installer. The coating may be applied in a swirl or ripple pattern using a squeegee, brush, or other tool. In other cases, the design is achieved by chemical means, such as spraying or swirling a solvent to alter the pigment colors or thickness. It’s also possible to use heat to create color effects.
5. Repeat as needed
Once the epoxy has been allowed to cure for several hours, it may be necessary to add a second coat. For some multi-colored effects, a solid base coat is applied first and a metallic coat is applied on top of it for higher contrast.
6. Seal if required
Finally, depending on the type of metallic design required, the floor coating installer may choose to add a final coat of clear epoxy or even of a clear urethane coating.
Hire an experienced professional
While you may see DIY kits for metallic epoxy systems, these are typically geared for ambitious homeowners for their own private enjoyment. As you can see from the steps above, a proper metallic epoxy installation job takes a good amount of knowledge and experience, plus practice with the specific design techniques. If your floor is going to impress future customers and clients, you’ll want to make sure you call in a professional!
If you’re looking for an epoxy floor coating installer in the Southeastern United States, give us a call at (864) 855-0600 or contact us online for a free consultation. We’d love to discuss the possibilities for your commercial space!

